
Mastering the Basics: Using RoomDB in Your Android App!
In this article, I’ll break down using RoomDB for Android development, giving you the core knowledge to confidently store and manage your app’s data.
What is RoomDB?
RoomDB is a powerful tool for Android developers looking to manage local data within their applications. It acts as an abstraction layer on top of SQLite, a widely used relational database engine. This means it provides a simpler and more developer-friendly way to interact with your app’s data compared to using raw SQL.
I will use my previous example (Using Hilt) as a starting point. We will create an application to operate a contacts (not a phone contacts list) list with a search ability.
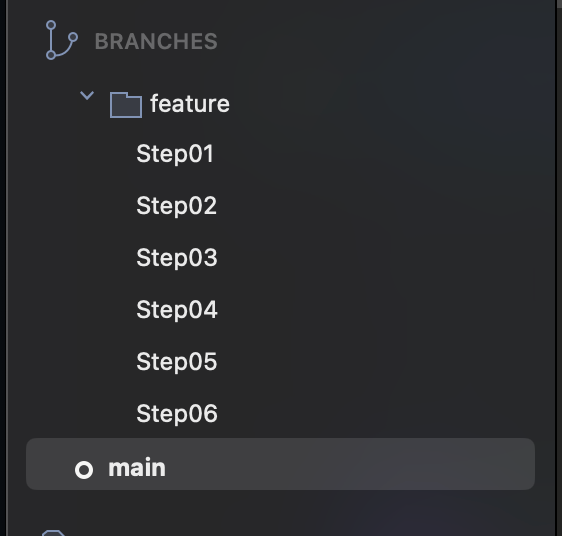
GitHub repository structure. Each step has its own branch so you can analyze what changes were made to better understand them.
Step01 – Setting things up
Updates in version catalog
In this example project I will continue to use Version Catalog, Hilt and my navigation helper. I will create separate branches in main repository witch final changes for each step.
To get started with RoomDB, we’ll need to add some dependencies. First, update your project’s Version Catalog with the following lines:
[versions]
roomVersion = "2.6.1"
kspVersion = "1.9.21-1.0.15"

[libraries]
android-room-runtime = {module="androidx.room:room-runtime", version.ref="roomVersion"}
androidx-room-compiler = {module="androidx.room:room-compiler", version.ref="roomVersion"}

ksp-symbol-processing-api = {module="com.google.devtools.ksp:symbol-processing-api", version.ref="kspVersion"}

[plugins]
ksp = { id = "com.google.devtools.ksp", version.ref = "kspVersion"}
For comprehensive development, consider adding a testing dependency like this:
androidx-room-testing = { module = "androidx.room:room-testing", version.ref = "roomVersion" }While this example won’t cover RoomDB testing, it’s a valuable practice.
Updates in gradle configuration files
The next step involves configuring Gradle, the build system used by Android projects. We’ll achieve this by adding a dependency to the plugins section of your project’s main Gradle file (often named build.gradle). Here’s what you need to add:
plugins {
....
     alias(libs.plugins.ksp)
}
The next step involves modifying your module-level Gradle file. This file manages dependencies specific to a particular module within your project. Here’s what you need to add:
plugins {
...
    id("kotlin-kapt")
    alias(libs.plugins.ksp)
}

dependencies {
....
    //RoomDB
    implementation(libs.androidx.room.runtime)
    ksp(libs.androidx.room.compiler)
}
We are done with configuration stage.
Step02 – Preparing models and DB Service
For additional changes: Add the following line to the android section within your module-level Gradle file (often named app/build.gradle):
android {
...
    ksp {
        arg("room.schemaLocation", "$projectDir/schemas")
    }
....
}
This line is particularly important. It acts as a guide for KSP (Kotlin Symbol Processing), a tool used by RoomDB. KSP analyzes your code to generate the necessary database schema. This line tells KSP exactly where to find the information it needs about your database structure.
Data model
In the previous example, we explored a basic contacts model. Now, we’ll take it a step further. We’ll recreate the same model, but this time, we’ll equip it with the necessary annotations to work seamlessly with RoomDB. Additionally, we’ll make some adjustments to the id field. Here’s what the finished model will look like:
@Entity(tableName = "contacts")
data class ContactModel(
    @PrimaryKey(autoGenerate = true)
    val id: Int? = null,

    @ColumnInfo(name = "firstName")
    val firstName: String,

    @ColumnInfo(name = "lastName")
    val lastName: String,

    @ColumnInfo(name = "phoneNumber")
    val phoneNumber: String
)
Understanding @Entity and @PrimaryKey Annotations
These annotations are essential for working with RoomDB. Let’s break them down:
@Entity(tableName = "contacts"): This annotation marks theContactsclass as a blueprint for a database table. ThetableNameparameter specifies the table name within your database (in this case, “contacts”).@PrimaryKey(autoGenerate = true): This annotation identifies a primary key for the table. A primary key is a unique identifier for each record, allowing you to efficiently retrieve and manage specific entries. Here’s what this specific configuration does:@PrimaryKey: Declares theidfield as the primary key for the “contacts” table.autoGenerate = true: Instructs RoomDB to automatically generate unique IDs for each newContactsobject you store. This eliminates the need for you to manually assign IDs, simplifying data management.
Why Auto-Generated IDs Matter
In most cases, using auto-generated IDs is recommended. Here’s why:
- Uniqueness: Each record will have a distinct ID, ensuring easy identification and retrieval.
- Convenience: RoomDB handles ID generation, saving you time and potential errors.
Alternative: Custom Primary Keys
While auto-generated IDs are common, you can define your own primary key using a unique field like a UUID. However, ensure the chosen field guarantees uniqueness to avoid conflicts within the database.
Now, let’s create a Data Access Object (DAO) to interact with our Contacts table. Within a new package named dao, create a file called ContactsDao.kt and define an interface inside it.
Completed version will look like this:
@Dao
interface ContactsDao {
    @Query("SELECT * FROM contacts order by contacts.firstName, contacts.lastName")
    fun getAllContacts(): List<ContactModel>

    @Insert
    fun insert(contactModel: ContactModel)

    @Delete
    fun delete(contactModel: ContactModel)

    @Update
    fun update(contactModel: ContactModel)

    @Query("SELECT * FROM contacts where id = :contactId")
    fun getContactById(contactId:Int): ContactModel?
}
Understanding @Dao and Database Interactions
The @Dao annotation plays a central role in interacting with your RoomDB database. Let’s break it down:
@Dao: This annotation marks an interface or abstract class as a Data Access Object (DAO). DAOs serve as the primary point of contact for your application code when working with the database. They encapsulate methods for various database operations like inserting, updating, deleting, and retrieving data.
Room’s Magic: Generating DAO Implementations
When you reference a DAO class within your database class (annotated with @Database), Room performs some magic behind the scenes. At compile time, Room automatically generates a concrete implementation of the DAO interface. This generated implementation provides the actual functionality for your defined methods.
Crafting Queries with @Query
The @Query annotation allows you to define methods that execute custom SQL queries against your database. Since RoomDB leverages SQLite, you can utilize standard SQL syntax within your queries.
Here’s an example:
@Query("SELECT * FROM contacts ORDER BY contacts.firstName, contacts.lastName")
List<Contact> getAllContactsOrderedByName();
This query retrieves all records from the “contacts” table, sorting them first by firstName and then by lastName. The result is returned as a list of Contact objects.
Additional Methods and Annotations
RoomDB offers other annotations for commonly used database operations:
@Insert: Used for inserting new data into the database.@Update: Used for updating existing data in the database.@Delete: Used for deleting data from the database.
It’s generally recommended to name your DAO methods descriptively to enhance readability and maintainability.
Database access service
To interact with our Room database, we’ll introduce a singleton service class. This class will act as a central access point for all database operations. Let’s create a file named DbService.kt within a new package called services. Here’s the completed structure
@Singleton
class DbService @Inject constructor(@ApplicationContext applicationContext: Context) {

    private var _onDataChanged = EventStateFlow()
    /**
     * Subscribe to this Event to get notified when data has changed
     */
    val onDataChanged = _onDataChanged.asStateFlow()

    companion object {
        const val CURRENT_VERSION = 1
    }

    fun notifyDataChanges() {
        _onDataChanged.notifyObservers()
    }

    val db = Room.databaseBuilder(
        applicationContext,
        AppDatabase::class.java, "contacts-db"
    ).build()
}

@Database(
    entities = [ContactsDao::class], version = DbService.CURRENT_VERSION
)

abstract class AppDatabase : RoomDatabase() {
    abstract fun contactDao(): ContactsDao
}
Understanding @Database and the AppDatabase Class
The @Database annotation is the foundation for defining your Room database. It serves two key purposes:
- Entity Declaration: It specifies the data models (entities) that will be represented as tables within your database. In our case, the
Contactsclass acts as the entity. - Database Version: It establishes the database schema version. It’s recommended to start with version 1 and handle version upgrades as needed (we’ll explore this later).
Our AppDatabase class, inheriting from RoomDatabase, serves as the blueprint for the database structure. Currently, it houses a single table based on the Contacts entity defined in the ContactsDao class.
DbService: A Centralized Access Point (Singleton)
The DbService class adopts a singleton pattern, meaning there’s only one instance of this service throughout your application. This approach promotes centralized management of database interactions. (We’ll discuss dependency injection using Hilt later).
The db variable within DbService holds the reference to the actual database instance. Additionally, the class provides an event flow (evenFlow) that allows other parts of your application to subscribe to changes in the database data.pen_spark
Step02 is done.
Step03 – Creating use cases to operate with data
Building the Foundation: Introducing BaseUseCase
Now that we have the database infrastructure in place, let’s move on to creating use cases for data access. These use cases will encapsulate the business logic for interacting with the database.
As the first step, we’ll create a BaseUseCase class. This class will serve as a foundation for all our other use cases, providing essential functionalities:
- CoroutineScope with Dispatchers.IO: The
BaseUseCaseclass will establish aCoroutineScopeconfigured withDispatchers.IO. This ensures that any long-running database operations launched within our use cases will be executed on a background thread, preventing UI thread blockage. This approach helps maintain a smooth and responsive user experience.
open class BaseUseCase {
    internal val coroutineScope = CoroutineScope(Dispatchers.IO)
}
GetAllContactsUseCase – retrieves list of all contacts from database:
class GetAllContactsUseCase @Inject constructor(private val dbService: DbService) : BaseUseCase() {
    suspend operator fun invoke(): List<ContactModel> =
        withContext(coroutineScope.coroutineContext) {
            dbService.db.contactDao().getAllContacts()
        }
}
InsertContactUseCase – adds new contact record
class InsertContactUseCase @Inject constructor(private val dbService: DbService) : BaseUseCase() {
    suspend operator fun invoke(contact:ContactModel) {
        withContext(coroutineScope.coroutineContext) {
            dbService.db.contactDao().insert(contact)
            dbService.notifyDataChanges()
        }
    }
}
UpdateContactUseCase – updates contact record
class UpdateContactUseCase @Inject constructor(private val dbService: DbService) : BaseUseCase() {
    suspend operator fun invoke (contact:ContactModel) {
        withContext(coroutineScope.coroutineContext) {
            dbService.db.contactDao().update(contact)
            dbService.notifyDataChanges()
        }
    }
}
DeleteContactUseCase – deletes record from database
class DeleteContactUseCase @Inject constructor(private val dbService: DbService) : BaseUseCase() {
    suspend operator fun invoke(contact: ContactModel) {
        withContext(coroutineScope.coroutineContext) {
            dbService.db.contactDao().delete(contact)
            dbService.notifyDataChanges()
        }
    }
}
GetContactByIdUseCase – retrieves single contact records by its ID or null if no record found
class GetContactByIdUseCase @Inject constructor(private val dbService: DbService) : BaseUseCase() {
    suspend operator fun invoke(contactId: Int): ContactModel? =
        withContext(coroutineScope.coroutineContext) {
            dbService.db.contactDao().getContactById(contactId)
        }
}
Important: Performing Database Operations on a Background Thread
It’s crucial to remember that database interactions can be time-consuming, potentially blocking the main UI thread if executed directly. To maintain a smooth user experience, it’s essential to perform all database operations on a background thread.
Step04 – Putting all together
Obtaining Data in ViewModels (without full source code)
While I won’t be including the complete source code for each screen here, you can find it in the provided GitHub repository at the end of article. However, I’ll guide you through the process of retrieving data in ViewModels, which is a streamlined approach thanks to the use cases we created in Step 3.
Let’s focus on the ContactView composable as an example. To fetch contact data for this view, we’ll leverage the GetAllContactsUseCase class.
@HiltViewModel
class ContactsViewModel @Inject constructor(
    private val customNavigator: CustomNavigator,
    private val dbService: DbService,
    private val getAllContactsUseCase: GetAllContactsUseCase,
    private val deleteContactUseCase: DeleteContactUseCase
) : ViewModel() {

    val data = mutableStateListOf<ContactModel>()

    init {
        viewModelScope.launch {
            dbService.onDataChanged.collect {
                loadData()
            }
        }

        viewModelScope.launch {
            loadData()
        }
    }

    private suspend fun loadData() {
        data.clear()
        data.addAll(getAllContactsUseCase())
    }

    fun editContact(contact: ContactModel) {
        customNavigator.navigate(NavigationPath.EDIT_CONTACT_VIEW + "/${contact.id}")
    }

    fun goToAddNewContact() {
        customNavigator.navigate(NavigationPath.ADD_CONTACTS_VIEW)
    }

    fun deleteContact(contact: ContactModel) {
        viewModelScope.launch {
            deleteContactUseCase(contact)
        }
    }

}
Why Use viewModelScope.launch with Use Cases?
A common question arises: why use viewModelScope.launch in the ViewModel to access the database when the use case already runs on an IO thread? Wouldn’t it be simpler to remove the coroutine from the use case and handle it all in the ViewModel?
While technically possible, this approach introduces unnecessary complexity and potential issues. Here’s why using viewModelScope.launch with use cases is beneficial:
- Structured Concurrency:
viewModelScopeprovides a structured way to launch coroutines within the ViewModel’s lifecycle. It automatically cancels any child coroutines when the ViewModel is cleared, preventing memory leaks or unintended side effects. - Data Updates on the Main Thread: When using
viewModelScope.launch, data retrieved from the database is delivered on the main thread. This is ideal for updating the UI within the ViewModel, as UI operations should typically happen on the main thread. - Separation of Concerns: Use cases encapsulate the business logic for data access, while ViewModels handle UI logic and data presentation. This separation promotes cleaner and more maintainable code.
Let’s consider a scenario where you remove the coroutine from the use case and directly call it from the ViewModel without viewModelScope.launch. You might write code like this:
    private suspend fun loadData() {
        viewModelScope.launch(Dispatchers.IO) {
            data.clear()
            data.addAll(getAllContactsUseCase())
        }
    }
There’s a potential issue to consider when fetching data and updating the UI. If you modify data directly outside of the ViewModel’s scope (often the main thread or UI thread), you might encounter a crash on app startup when data becomes available. This crash typically results in an error like:
java.lang.IllegalStateException: Reading a state that was created after the snapshot was taken or in a snapshot that has not yet been applied
The reason for this crash lies in Jetpack Compose’s snapshot mechanism. It ensures UI consistency by taking snapshots of your composable hierarchy and its state. Modifying data outside of the ViewModel’s scope (like viewModelScope.launch) disrupts this mechanism, leading to the crash.
Solution: Leverage viewModelScope.launch
To prevent this crash and ensure proper UI updates, we should leverage the viewModelScope.launch function within your ViewModel. This function launches a coroutine tied to the ViewModel’s lifecycle. Here’s an example of how you can use it to fetch data and update the UI safely:
There’s a potential issue to consider when fetching data and updating the UI. If you modify data directly outside of the ViewModel’s scope (often the main thread or UI thread), you might encounter a crash on app startup when data becomes available. This crash typically results in an error like:
    private suspend fun loadData() {
        viewModelScope.launch(Dispatchers.IO) {
            data.clear()
            val tmp : List<ContactModel>
            withContext(Dispatchers.IO) {
                tmp = getAllContactsUseCase()
            }
            data.addAll(tmp)
        }
    }
While the provided solution with viewModelScope.launch effectively prevents crashes, repeatedly writing this pattern within your ViewModel can become cumbersome.
Let’s continue. Next will be AddContactView composable with AddContactViewModel.
Important part is where we save data into database:
    fun save() {
        if (!canBeSaved) {
            return
        }

        viewModelScope.launch {
            insertContactUseCase(ContactModel(firstName = firstName, lastName = lastName, phoneNumber = phoneNumber))

            goBack()
        }
    }
The addContactUseCase comes into play when saving a new contact record. We’ll pass a new instance of the ContactModel class to this use case. After successful addition, the user will typically navigate back to the main contacts screen (ContactsView).
Reminder
All operations with database must be done in IO Thread!
Never use Main (UI) Thread to access data!
And the last part is to add EditContactView. Important part is to save data and here it is:
    fun save() {
        if (!canBeSaved) {
            return
        }

        viewModelScope.launch {
            val updatedContact = contactToEdit!!.copy(
                id = contactToEdit!!.id,
                firstName = firstName,
                lastName = lastName,
                phoneNumber = phoneNumber
            )

            updateContactUseCase(updatedContact)

            goBack()
        }
    }
Here I am making a copy of ContactModel, change all fields except id, and I pass it into UpdateContactUseCase.
Step04 is done.
Step05 – Upgrading database structure.
As your application evolves, you might need to modify the structure of your database (adding new fields, changing data types, etc.). RoomDB offers two approaches to handle these schema changes: automatic and manual.
In this section, we’ll focus on a simple automatic upgrade process. Here’s a crucial point to remember before making any changes:
Update DbService First: Always modify the DbService class (or the class responsible for defining your database schema) before updating the data model (ContactModel) and building your project. If you build without updating DbService, you’ll end up with a mismatch between your code and the actual database schema, potentially leading to issues.
Let’s imagine we need to add an EMail field to the ContactModel. Here’s how to proceed:
Modify DbService: Update the DbService class to reflect the new schema. This might involve:
Incrementing the DATABASE_VERSION variable within @Database to signal a schema change (e.g., from 1 to 2). Adding autoMigrations parameter into @Database with AutoMigration from version 1 to 2.
    companion object {
        const val CURRENT_VERSION = 2
    }
@Database(
entities = [ContactModel::class], version = DbService.CURRENT_VERSION, autoMigrations = [
AutoMigration(from = 1, to = 2)
]
)Update Data Model (ContactModel): Now, you can safely modify the ContactModel class to include the new EMail field.
@Entity(tableName = "contacts")
data class ContactModel(
    @PrimaryKey(autoGenerate = true)
    val id: Int? = null,

    @ColumnInfo(name = "firstName")
    val firstName: String,

    @ColumnInfo(name = "lastName")
    val lastName: String,

    @ColumnInfo(name = "phoneNumber")
    val phoneNumber: String,

    @ColumnInfo(name = "email")
    val email: String?
)
Rebuild Project: Rebuild your project after making these changes. Room will automatically migrate the existing database schema to the new version during the build process.pen_spark
New Field and Nullable Values
By making the EMail field nullable in ContactModel, all existing records in your database will have this field set to null after the upgrade. This is because Room doesn’t modify existing data by default unless you specify otherwise during migration.
Optional: Providing a Default Value
If you want to assign a default value (like an empty string) to the new EMail field for existing records, you can handle this during the database migration process. This typically involves creating a migration class, but that’s beyond the scope of this simple automatic upgrade example.
    @ColumnInfo(name = "email", defaultValue = "default value")
    val email: String?
Updating ViewModels for the New Field
With the EMail field added to ContactModel, we need to update the relevant ViewModels to handle this new information. This likely involves modifying the AddContactViewModel and EditContactViewModel classes.
    var email by mutableStateOf<String?>(null)
        private set

    fun updateEmail(it: String) {
        email = it
        // no need to call updateCanBeSaved since em,ail is not mandatory field.
    }

// In AddContactViewModel save function will be like this

    fun save() {
        if (!canBeSaved) {
            return
        }

        viewModelScope.launch {
            insertContactUseCase(
                ContactModel(
                    firstName = firstName,
                    lastName = lastName,
                    phoneNumber = phoneNumber,
                    email = email
                )
            )

            goBack()
        }
    }

// In EditContactViewMode save function will be like this
    fun save() {
        if (!canBeSaved) {
            return
        }

        viewModelScope.launch {
            val updatedContact = contactToEdit!!.copy(
                id = contactToEdit!!.id,
                firstName = firstName,
                lastName = lastName,
                phoneNumber = phoneNumber,
                email = email
            )

            updateContactUseCase(updatedContact)

            goBack()
        }
    }
Verifying the Updated Schema (Platform-Independent)
After rebuilding your project, let’s verify that the database schema reflects the changes you made. Here’s a more general approach that works on various operating systems:
- Locate the Schema Files: Navigate to your project directory using your preferred file explorer or terminal.
- Find the Schemas Folder: Within the project directory, locate the folder named “schemas” (created during setup in Step 2).
- Open the Relevant JSON File: Inside the “schemas” folder, you’ll find a subfolder with your package name (e.g., “com.rayadams.roomdbexample.services”). Open the JSON file that corresponds to the new database version (in this case, “2.json”).
This JSON file should contain the updated schema definition for your Room database, including the newly added EMail field in the ContactModel class.
{
  "formatVersion": 1,
  "database": {
    "version": 2,
    "identityHash": "101151b73841b05b968166de29d47f07",
    "entities": [
      {
        "tableName": "contacts",
        "createSql": "CREATE TABLE IF NOT EXISTS `${TABLE_NAME}` (`id` INTEGER PRIMARY KEY AUTOINCREMENT, `firstName` TEXT NOT NULL, `lastName` TEXT NOT NULL, `phoneNumber` TEXT NOT NULL, `email` TEXT)",
        "fields": [
          {
            "fieldPath": "id",
            "columnName": "id",
            "affinity": "INTEGER",
            "notNull": false
          },
          {
            "fieldPath": "firstName",
            "columnName": "firstName",
            "affinity": "TEXT",
            "notNull": true
          },
          {
            "fieldPath": "lastName",
            "columnName": "lastName",
            "affinity": "TEXT",
            "notNull": true
          },
          {
            "fieldPath": "phoneNumber",
            "columnName": "phoneNumber",
            "affinity": "TEXT",
            "notNull": true
          },
          {
            "fieldPath": "email",
            "columnName": "email",
            "affinity": "TEXT",
            "notNull": false
          }
        ],
        "primaryKey": {
          "autoGenerate": true,
          "columnNames": [
            "id"
          ]
        },
        "indices": [],
        "foreignKeys": []
      }
    ],
    "views": [],
    "setupQueries": [
      "CREATE TABLE IF NOT EXISTS room_master_table (id INTEGER PRIMARY KEY,identity_hash TEXT)",
      "INSERT OR REPLACE INTO room_master_table (id,identity_hash) VALUES(42, '101151b73841b05b968166de29d47f07')"
    ]
  }
}
Automated Room migrations rely on the generated database schema for both the old and the new versions of the database. In our case, upgrade, or let’s use proper name, migration is very straightforward and RoomDB will be able to see that new field has been added into table and nothing else.
Part05 is done. For more complex migrations you can check this link Migrate your Room database | Android Developers.
Step06 – Enhancing ContactView with Search
In the final section, let’s explore how to add search capabilities to the ContactView. This will allow users to easily find contacts based on their first or last names.
Integrating search functionality is a manageable task. Here’s how we’ll approach it:
- New Search Function in ContactsDao: We’ll introduce a new function named
searchContactswithin theContactsDaoclass. This function will be responsible for querying the database based on a provided search term. - Search Logic in ViewModel: The
ContactListViewModel(or a dedicated search view model) will handle user interactions with the search bar. It will retrieve the search term and leverage thesearchContactsfunction from the DAO to fetch matching contacts. - Updating UI with Search Results: Once the search results are available, the ViewModel will update the UI within
ContactViewto display only the contacts that match the search criteria.
    @Query("SELECT * FROM contacts WHERE firstName LIKE :searchString || '%' " +
            "OR lastName LIKE :searchString || '%' " +
            "ORDER BY contacts.firstName, contacts.lastName")
    fun searchContacts(searchString:String): List<ContactModel>
This function accepts searchString and search Contacts table for records where First or Last names starts with provided searchString. To read more about LIIKE patters please read this article SQLite LIKE – Querying Data Based On Pattern Matching (sqlitetutorial.net)
Next we will update GetAllContactsUseCase and this is the result of a change:
class GetAllContactsUseCase @Inject constructor(private val dbService: DbService) : BaseUseCase() {
    suspend operator fun invoke(searchString: String): List<ContactModel> =
        withContext(coroutineScope.coroutineContext) {
            if (searchString.isBlank()) {
                dbService.db.contactDao().getAllContacts()
            } else {
                dbService.db.contactDao().searchContacts(searchString)
            }
        }
}
If provided searchString is empty the use case will return all records, otherwise it will return filtered result.
Small changes in ContactsViewModel and ContactView.
// In View model
    var searchString by mutableStateOf("")
        private set

    fun updateSearchString(value: String) {
        searchString = value
        loadData()
    }

    private fun loadData() {
        viewModelScope.launch {
            data.clear()
            data.addAll(getAllContactsUseCase(searchString))
        }
    }
// In ContactsView composable
TextField(value = viewModel.searchString,
modifier = Modifier
.fillMaxWidth()
.padding(bottom = 10.dp, start = 8.dp, end = 8.dp),
label = { Text(stringResource(R.string.txt_search)) },
trailingIcon = {
IconButton(
enabled = viewModel.searchString.isNotBlank(),
onClick = { viewModel.updateSearchString("") }) {
Icon(Icons.Default.Clear, contentDescription = stringResource(R.string.txt_clear))
}
},
onValueChange = {
viewModel.updateSearchString(it)
})
Step06 is done.
Conclusion
RoomDB is a powerful and lightweight solution for managing persistent data within your Android applications. It offers a structured approach for storing various data types, including text, numeric, date as well as blob like binary data (Images, audio files or any other non-textual content)
Benefits of RoomDB:
- Simplified Data Management: RoomDB streamlines data access and manipulation compared to implementing custom storage mechanisms using text or binary files.
- Type Safety: Enforces data types, reducing the risk of errors and improving code maintainability.
- Automatic Schema Migrations: (Optional) RoomDB can handle database schema updates during app version upgrades (covered in a separate article).
Cloud Backup Considerations:
While RoomDB files in the default location might be synchronized to Google Cloud, this backup is typically triggered for databases smaller than 25MB. For bigger databases, consider implementing a manual backup and restore solution (will be covered in a future article).
As always source code is located on GitHub in this repository. XRayAdams/room_db_example: RoomDB Example (github.com)