
Get started with Hilt: Dependency Injection for Jetpack Compose
Struggling with DI in Jetpack Compose? You’re not alone!
This guide cuts through the complexity with a sample app, showing you how to use Hilt for Dependency Injection with minimal setup.
What is a Dependency Injection?
Dependency injection (DI) is a software design pattern that helps you write cleaner, more testable, and maintainable Android apps.
In simpler terms, instead of a class creating the objects it depends on (its dependencies), those objects are provided to the class by another object. This allows for more loosely coupled components and makes your code more flexible.
Overall, dependency injection is a powerful technique that can help you write better Android applications. If you’re not already using it, it’s definitely worth considering!
What is a Hilt?
Hilt is a library that simplifies DI for Jetpack Compose. It takes care of finding and delivering the dependencies your application needs.
While understanding the core concept of DI is valuable, this guide focuses on getting you started quickly with a practical example. If you’re curious about the deeper theory of DI, there are many resources available online.
Installation
Integrating Hilt is a breeze! Whether you’re starting a new project or adding it to an existing one, follow these steps:
Add dependencies into Gradle configuration files
Simplify Dependency Management with Version Catalogs
This sample application leverages a Version Catalog file to streamline dependency management. Here, you’ll only need to specify the current versions for Hilt itself (2.51.1 at the time of writing) and Hilt Navigation (1.2.0).
If you never used Version Catalog before, please read this page.
[versions]
hiltVersion = "2.51.1"
hiltNavigationVersion = "1.2.0"

[libraries]
hilt-android = { module = "com.google.dagger:hilt-android", version.ref = "hiltVersion" }
hilt-navigation-compose = { module = "androidx.hilt:hilt-navigation-compose", version.ref = "hiltNavigationVersion" }
hilt-android-testing = { module = "com.google.dagger:hilt-android-testing", version.ref = "hiltVersion" }
hilt-android-compiler = { module = "com.google.dagger:hilt-android-compiler", version.ref = "hiltVersion" }

[plugins]
hilt-application = { id = "com.google.dagger.hilt.android", version.ref = "hiltVersion" }
Nest step is to update gradle configuration files.
In a build.gradle (at project level) in plugins section add this line:
plugins {
...
    alias (libs.plugins.hilt.application) apply false
...
}
In build.gradle (application level) add this lines in plugins section:
plugins {
...
    alias (libs.plugins.hilt.application)
...
}
In dependencies section add this:
dependencies {
...

    //hilt
    implementation (libs.hilt.android)
    kapt (libs.hilt.android.compiler)
    implementation (libs.hilt.navigation.compose)

...
}
Enable Code Generation with kapt
To leverage Hilt’s code generation capabilities, you’ll need kapt support enabled in your project. If it’s not already active, simply add id("kotlin-kapt") to your application-level build.gradle file.
Looking Ahead: KSP
While Google recommends eventually migrating to KSP (Kotlin Symbol Processing), its support for Hilt is currently in alpha and not recommended for production use. We’ll stick with kapt for now, but keep an eye on KSP for future improvements!
Almost There! Setting Up Your Application Class
With the core setup complete, just a few more steps remain. First, create a class that inherits from android.app.Application. Then, annotate this class with @HiltAndroidApp to enable Hilt’s code generation for your application.
@HiltAndroidApp
class App : Application()
Nest step involves changes in AndroidManifest.xml.
Make this change in an application section:
    <application
...
       android:name=".App"
...
    </application>
The final step involves marking the classes that need to use dependency injection with @AndroidEntryPoint. In our case, let’s annotate the MainActivity class to allow Hilt to inject its dependencies.
...
@AndroidEntryPoint
class MainActivity : ComponentActivity() {
...
Done! You are ready to use DI in your project!
Let’s Build a Contact List App with Hilt!
To get hands-on with Hilt, we’ll create a simple Android application for managing contacts. This app won’t use permanent storage, so any new or edited contacts will reside in memory for demonstration purposes.
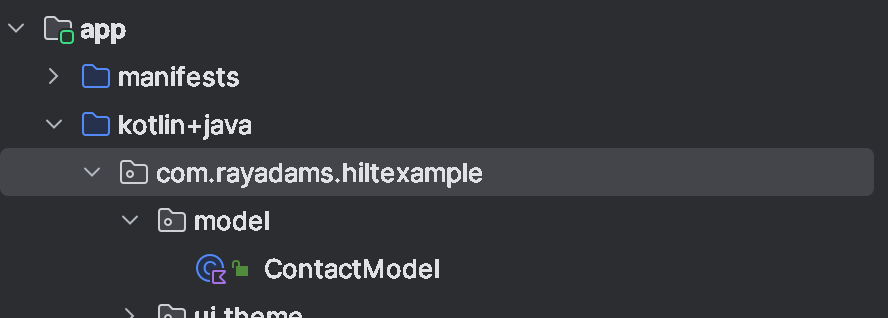
Let’s start by creating a data class to represent a contact. We’ll place this class in a package named models for better organization. Name the class ContactModel to clearly reflect its purpose.
data class ContactModel(
    val id: UUID = UUID.randomUUID(),
    val firstName: String,
    val lastName: String,
    val phoneNumber: String
)
Focusing on Dependency Injection
While this example won’t delve into navigation, I’ve previously covered an approach using Hilt to inject a custom navigator class. Here, we’ll concentrate on demonstrating core Hilt concepts for dependency injection.
Creating repository to hold contacts data
Managing Contacts with a Repository
To handle our contact data efficiently, we’ll introduce a ContactsRepository. This interface and its implementing class will reside in a dedicated repositories package. Since this repository interacts directly with the contact data, we’ll leverage Hilt to inject it into the components that need it.
interface ContactsRepository {
    val contacts: List<ContactModel>
    val onDataChanged: SharedFlow<Unit>

    fun addContact(contactModel: ContactModel)
    fun getContactByID(id: UUID): ContactModel?
    fun deleteContact(contactModel: ContactModel)
    fun updateContact(id: UUID, firstName: String, lastName: String, phoneNumber: String)
}

class ContactsRepositoryImpl : ContactsRepository {

    private val _contacts = mutableListOf<ContactModel>()
    override val contacts: List<ContactModel> = _contacts

    /**
     * This flow event keeps subscribers informed whenever the data changes,
     * regardless of its source (database or memory).
     * It's a powerful approach for applications that require immediate updates for all interested parties.
     */
    private val _onDataChanged =
        MutableSharedFlow<Unit>(replay = 1, onBufferOverflow = BufferOverflow.DROP_LATEST)
    override val onDataChanged: SharedFlow<Unit> = _onDataChanged

    override fun addContact(contactModel: ContactModel) {
        _contacts.add(contactModel)
        notifySubscribers()
    }

    override fun getContactByID(id: UUID): ContactModel? = _contacts.firstOrNull { it.id == id }

    override fun deleteContact(contactModel: ContactModel) {
        _contacts.remove(contactModel)
        notifySubscribers()
    }

    override fun updateContact(id: UUID, firstName: String, lastName: String, phoneNumber: String) {
        val index = _contacts.indexOfFirst { it.id == id }
        if (index != -1) {
            _contacts[index] = _contacts[index].copy(
                firstName = firstName,
                lastName = lastName,
                phoneNumber = phoneNumber
            )
            notifySubscribers()
        }
    }

    /**
     * Alert subscribers to data updates and clear the notification replay cache to ensure new subscribers only receive current notifications.
     */
    @OptIn(ExperimentalCoroutinesApi::class)
    private fun notifySubscribers() {
        _onDataChanged.tryEmit(Unit)
        _onDataChanged.resetReplayCache()
    }

}
Injecting the Repository with Hilt Modules
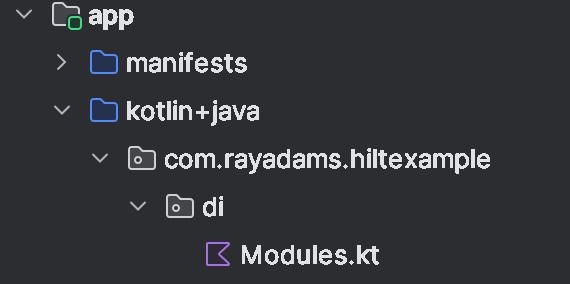
Now that we have the ContactsRepository, let’s make it injectable by Hilt. We’ll achieve this by creating a Hilt module. Go ahead and create a new package named di (for dependency injection) and add a Kotlin file named Modules.kt inside it.
@Module
@InstallIn(SingletonComponent::class)
object ContactsRepositoryModule {
    @Singleton
    @Provides
    fun provideContactsRepository(): ContactsRepository = ContactsRepositoryImpl()
}
Here’s a breakdown of the essential Hilt annotations you’ll encounter:
1. @Module: This annotation marks a class as a Hilt module, essentially a blueprint for how to create and provide objects for dependency injection.
2. @InstallIn(SingletonComponent::class): This annotation specifies where the module fits within Hilt’s component hierarchy. In this case, by using SingletonComponent, we ensure the module is available throughout the entire application lifecycle, making its provided objects singletons.
Annotations for Function Definitions:
1. @Singleton: This annotation ensures that only a single instance of the provided object is created throughout the application, promoting efficiency and consistency.
2. @Provides: This annotation marks a method within a module that creates and returns a specific object for injection. The method’s return type will then be bound to the returned object, making it available for injection wherever needed.
Module Dependencies:
If a module depends on objects from another module, you can easily inject them within the @Provides function using Hilt’s dependency injection mechanism. This allows for modular and organized code structures.
Key Points:
- Modules serve as instruction sets for object creation and provision.
@InstallIndetermines the scope and lifecycle of the module’s provided objects.@Singletonguarantees a single instance.@Providesmarks methods that create injectable objects.- Modules can depend on other modules, making them extendable and flexible.
Leveraging Use Cases for Clean Code
To interact with our ContactsRepository in a structured and testable manner, we’ll introduce a concept called use cases. These are essentially classes that encapsulate specific business logic related to managing contacts. This approach promotes cleaner separation of concerns and simplifies testing.
GetAllContactsUseCase – retrieves list of contacts
class GetAllContactsUseCase @Inject constructor(private val contactsRepository: ContactsRepository) {
    operator fun invoke(): List<ContactModel> =
        contactsRepository.contacts.sortedWith(compareBy(
            { it.firstName }, { it.lastName }
        ))
}
GetContactByIdUseCase – retrieves single contact by it’s ID
class GetContactByIdUseCase @Inject constructor(private val contactsRepository: ContactsRepository) {
    operator fun invoke(id: UUID): ContactModel? = contactsRepository.getContactByID(id)
}
DataValidUseCase – use case to validate fields
class DataValidUseCase @Inject constructor() {
    operator fun invoke(firstName:String, lastName:String, phoneNumber:String): Boolean =
        firstName.isNotBlank() && lastName.isNotBlank() && phoneNumber.isNotBlank()
}
The DataValidationUseCase perfectly demonstrates the value of using use cases. Data validation logic can easily get scattered throughout your codebase without proper organization. By encapsulating this logic within a dedicated use case, you achieve several advantages:
- Reduced Code Duplication: You avoid copying and pasting the same validation code in multiple places.
- Improved Maintainability: Validation logic becomes easier to find, modify, and test when it’s centralized in a use case.
- Separation of Concerns: This keeps your code cleaner and more focused by separating validation logic from other functionalities.
Data operation use cases
AddContactUseCase – add new contactUpdateContactUseCase – update contactDeleteContactUseCase – delete contact
class AddContactUseCase @Inject constructor(private val contactsRepository: ContactsRepository,
    private val dataValidUseCase: DataValidUseCase) {
    operator fun invoke (firstName:String, lastName:String, phoneNumber:String) {
        if (dataValidUseCase(firstName, lastName, phoneNumber)) {
            contactsRepository.addContact(
                ContactModel(
                    firstName = firstName,
                    lastName = lastName,
                    phoneNumber = phoneNumber
                )
            )
        }
    }
}
class UpdateContactUseCase @Inject constructor(
private val contactsRepository: ContactsRepository,
private val dataValidUseCase: DataValidUseCase
) {
operator fun invoke(id: UUID, firstName: String, lastName: String, phoneNumber: String) {
if (dataValidUseCase(firstName, lastName, phoneNumber)) {
contactsRepository.updateContact(id, firstName, lastName, phoneNumber)
}
}
}class DeleteContactUseCase @Inject constructor(private val contactsRepository: ContactsRepository) {
operator fun invoke(contact: ContactModel) {
contactsRepository.deleteContact(contact)
}
}Use cases rely on Hilt for dependency injection, including the ContactsRepository and other use cases themselves.
Data manipulation in ViewModel
Focus on Key Concepts: Download Full Source Code on GitHub
While the entire ViewModel code won’t be shown here, you can download the complete source code from GitHub for further exploration. This guide will instead concentrate on demonstrating how the ViewModel leverages Hilt for dependency injection to access the necessary use cases.
ContactsViewModel
MainScreenViewModel: This ViewModel manages data and logic for displaying the list of contacts on the main screen.
@HiltViewModel
class ContactsViewModel @Inject constructor(
    private val customNavigator: CustomNavigator,
    private val deleteContactUseCase: DeleteContactUseCase,
    private val getAllContactsUseCase: GetAllContactsUseCase,
    private val contactsRepository: ContactsRepository
) : ViewModel() {
Injecting the ViewModel with Hilt
Since we’ve set up Hilt for dependency injection, there’s no need to manually create or provide the MainScreenViewModel (or any other ViewModel) in your composable.
@Composable
fun ContactsView(viewModel: ContactsViewModel = hiltViewModel()) {
Within your navigation graph, integrating the ContactsView composable becomes a breeze thanks to Hilt. As you can see in the code snippet, there’s no need to pass any parameters explicitly:
            composable(NavigationPath.CONTACTS_VIEW) {
                ContactsView()
            }
Behind the Scenes:
Hilt takes care of everything under the hood:
- It creates the
MainScreenViewModelinstance. - It injects any dependencies the ViewModel requires (like use cases).
- It provides the fully constructed ViewModel instance to your
ContactsViewcomposable.
The Same Pattern for Other ViewModels
The same dependency injection pattern using Hilt applies to your other ViewModels, such as AddContactViewModel and EditContactViewModel. This consistency promotes code maintainability and ensures efficient handling of dependencies throughout your application.
@HiltViewModel
class AddContactViewModel @Inject constructor(
    private val addContactUseCase: AddContactUseCase,
    private val dataValidUseCase: DataValidUseCase,
    private val customNavigator: CustomNavigator
) : ViewModel() {

@HiltViewModel
class EditContactViewModel @Inject constructor(
    state: SavedStateHandle,
    getContactByIdUseCase: GetContactByIdUseCase,
    private val dataValidUseCase: DataValidUseCase,
    private val updateContactUseCase: UpdateContactUseCase,
    private val customNavigator: CustomNavigator
) : ViewModel() {
Empowering You with Dependency Injection
By following this guide, you’ve gained a solid foundation for using Hilt for dependency injection in your Jetpack Compose projects. Remember, Hilt isn’t just powerful, it’s also straightforward! Applying this pattern, especially in larger projects, will significantly improve your code’s maintainability and make future development a breeze.
Full source code can be obtained in my GitHub repository : XRayAdams/HiltExample: Hilt Example (github.com).